
Silicone Roof Coating San Francisco | Extend Flat Roofs 15–20 Years
Silicone roof coating in San Francisco costs $3.50–$6.00/sqft and extends flat roofs 15–20 years. Learn when coating works vs. replacement, SF fog climate benefits, and real costs for 2026
The Silicon Roof Coating Reality in San Francisco (2025–2026)
Let me start with what you’re probably thinking.
You’ve got a flat roof in the Outer Sunset, Mission District, or SoMa that’s been patched and repatched for the last 5–7 years. A full replacement quote landed on your desk for $30,000–$45,000. That’s not happening this year. So someone mentioned silicone coating — “paint your roof, add 15–20 years, cost one-third of replacement.”
Sounds too good to be true? It’s not. But it’s also not magic, and it’s definitely not for every roof.
I’ve spent the last 15 years watching San Francisco flat roofs age under the fog belt, the salt air, and the thermal cycling that happens when Karl the Fog rolls in at 50°F and the sun burns through at 75°F. And I can tell you exactly when silicone coating makes sense — and when it’s a waste of money.
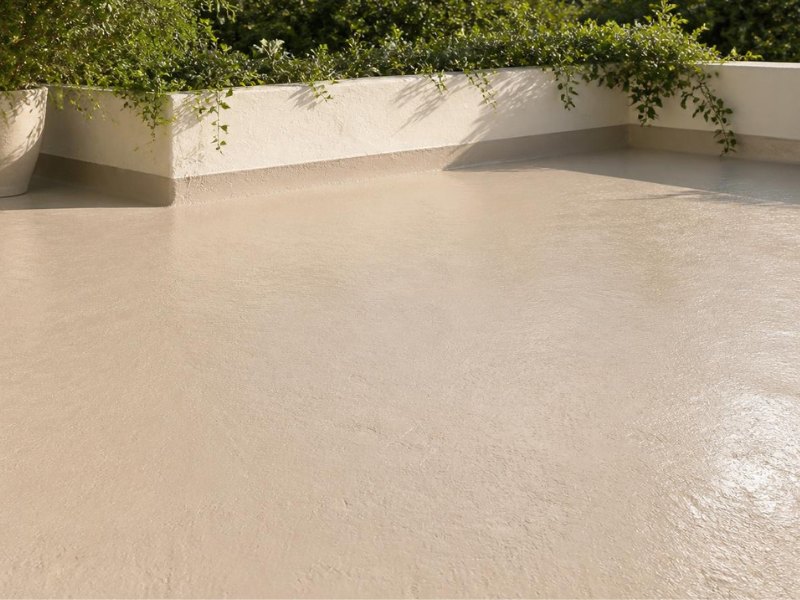
What Is Silicone Roof Coating? (And Why It’s Different From What Your Neighbor’s Roof Got)
A silicone roof coating is a fluid-applied waterproof membrane that cures into a seamless, rubber-like layer. You’re not replacing the roof. You’re not tearing anything off. You’re essentially painting a thick liquid onto the existing roof surface, where it hardens into a durable protective seal.
Here’s the critical distinction: Silicone is not acrylic. Not even close.
Many SF roofs have acrylic coating — that’s what Sure Roofing and some of the older contractors applied 10–15 years ago. Acrylic is water-based, cheaper upfront ($2.50–$4.00/sqft), and works fine on pitched roofs. But acrylic loses 1 mil of thickness per year in San Francisco’s climate. By year 10, the coating has thinned by a dime’s width. By year 15, you’re looking at bare spots and pooling water.
Silicone doesn’t thin. It maintains its protective layer across its entire lifespan.
The Chemistry That Matters in San Francisco
Silicone cures through moisture reaction — literally using the moisture from our fog-laden air to solidify. That’s why SF’s climate is actually ideal for silicone. Unlike acrylic systems that need dry weather windows, silicone can be applied in higher humidity and actually cures faster in our damp conditions.
The polymer chains in silicone are cross-linked and don’t break down under UV or ozone exposure the way acrylic does. This matters because San Francisco gets:
- 200+ fog days per year (moisture stress)
- Daily thermal cycling (55°F fog mornings to 75°F afternoons)
- Salt air from the Pacific (coastal corrosion on any exposed metal)
- Seismic micro-tremors (structural movement stress)
Silicone handles all of this. Acrylic cracks.
When Silicone Coating Works in San Francisco (The Real Checklist)
Not every roof should be coated. Full stop.
I’ve seen beautiful silicone applications fail because the underlying roof was already saturated with water trapped inside the insulation. I’ve seen coating applied to roofs with ponding water in areas that weren’t addressed, and the water just sat there under the coating, accelerating decay.
Your roof is a coating candidate if:
1. Structurally Sound Substrate
The existing roof deck — whether it’s modified bitumen, built-up tar and gravel, or old metal — needs to be structurally intact. No soft spots, no bowing, no visible rot.
A simple infrared moisture scan ($300–$500) will show if water is trapped in the insulation. If it is, coating is a waste of money and material. The moisture will continue degrading the system underneath, and you’ll have failure within 5 years.
2. Less Than 25% Existing Damage
If more than 25% of the roof has active seam failures, blistering, or exposed substrate, coating won’t solve the underlying problem. It’s a patch over a failing system.
Real SF example: A building in the Mission District had torch-down roofing from 1998. By 2020, seam failures covered maybe 15% of the roof, mostly in the corners where foot traffic is high. Silicone coating? Perfect candidate. They did the coating and got another 15 years.
3. Positive Drainage or Acceptable Ponding
This is where SF gets tricky. Many older buildings in the Richmond, Sunset, and Excelsior have sagging roofs where water pools. Silicone is tolerant of ponding water — unlike acrylic, which will break down and delaminate in standing water.
But “tolerant” doesn’t mean “resistant to pool maintenance for a decade.” If your roof has 2 inches of standing water in the same spot every winter, that’s a problem silicone coating cannot fix. You need tapered insulation or deck leveling.
If ponding is minimal (less than 1/2 inch in isolated spots after 24 hours), silicone coating handles it fine.
4. No Active Roof Leaks
This sounds obvious but it’s missed constantly. If your roof is actively leaking, coating won’t fix the source. You need seam repair, flashing correction, or drain work first. Then, once it’s dry and stable, apply the coating.
Silicone Roof Coating Cost in San Francisco 2026
Here’s where the locals get confused by Facebook ads.
Material cost alone: $3.50–$6.00 per square foot installed.
For a typical 1,500 sq ft flat roof (common on Avenues homes and small commercial buildings), that’s $5,250–$9,000 in material and labor combined.
What this actually includes:
- Power washing and surface preparation (critical — bad prep = failed adhesion)
- Infrared scan to confirm dry insulation
- Seam and penetration repairs (polyester fabric reinforcement at weak points)
- Two coats of silicone at proper mil thickness (typically 20–30 mils total)
- Primer (if required by the system)
- Warranty registration with manufacturer
What it does NOT include:
- Structural repairs (rotten wood, deck replacement)
- Tapered insulation for slope correction
- Drain cleaning or replacement
- Metal flashing replacement
- Title 24 compliance upgrades
Real SF Pricing by Neighbourhood
| 1,500 sq ft Roof | 3,000 sq ft Roof | Notes |
| $6,500–$9,000 | $14,000–$18,000 | Fog exposure premium; scheduling delays for weather |
| $6,000–$8,500 | $12,000–$17,000 | Dense urban; parking/logistics more complex |
| $7,000–$9,500 | $13,500–$19,000 | Victorian/Edwardian homes; complexity premium |
| $6,000–$8,000 | $12,000–$16,000 | Standard commercial work; competitive market |
| $7,500–$10,000 | $15,000–$20,000 | Mixed-use; street permits add cost |
Silicone vs. Acrylic vs. Full Replacement: The Real Comparison
This is where the decision gets made.
Silicone Coating
- Cost: $3.50–$6.00/sqft ($5,250–$9,000 for 1,500 sq ft)
- Lifespan: 15–20 years (no thickness loss)
- Application: 5–10 days
- Best for: Structurally sound roofs, fog-heavy neighbourhoods, budget-constrained owners
- Ponding water: Excellent resistance
- Maintenance: Annual inspection, drain cleaning, debris removal
- Warranty: 15–25 years (manufacturer-backed)
- Recoatable: Yes (after 5–7 years, can add another 10 years)
Acrylic Coating
- Cost: $2.50–$4.00/sqft ($3,750–$6,000 for 1,500 sq ft)
- Lifespan: 7–10 years (loses 1 mil/year)
- Application: 3–7 days
- Best for: Tight budgets, newer roofs (preventive maintenance), pitched or sloped sections
- Ponding water: Poor resistance — breaks down under sustained moisture
- Maintenance: Frequent inspections; coating can fail in high-moisture areas
- Warranty: 10–15 years
- Recoatable: Yes, but more frequent
Full Roof Replacement (TPO/PVC/Mod-Bit)
- Cost: $12–$18/sqft ($18,000–$27,000 for 1,500 sq ft)
- Lifespan: 20–30 years (single-ply) or 15–20 years (mod-bit)
- Application: 10–21 days
- Best for: Structurally compromised roofs, saturated insulation, new construction expectations
- Ponding water: Depends on slope/drainage; replacement allows tapered insulation fix
- Maintenance: Standard (annual inspections, drain cleaning)
- Warranty: 20–30 years (full system warranty)
- Recoatable: No; full replacement needed
Why Silicone Coating Works So Well in San Francisco’s Climate
This is not theoretical. This is what I’ve seen on roofs across the city for 10 years.
Fog Tolerance
The moisture-cure chemistry means silicone actually performs better in our fog belt than it does in dry inland climates. While acrylic needs dry weather windows to cure properly, silicone uses atmospheric moisture. Installation delays due to fog? Minimal.
Thermal Cycling Resilience
Silicone remains flexible across a wide temperature range (typically –40°F to 180°F). The Sunset’s 55°F morning and 75°F afternoon cycle? Silicone stretches and contracts without cracking. Acrylic gets brittle after 5–7 years.
Salt Air Resistance
The Pacific coast’s salt spray corrodes exposed metal flashing and fasteners, but silicone doesn’t depend on metal adhesion. It bonds to the membrane itself. Neighbourhoods like the Marina, Sea Cliff, and the Embarcadero see less flashing failure with silicone.
Ponding Water Performance
This is the SF advantage. In the Mission, Excelsior, and other neighborhoods where roofs have settled and don’t drain perfectly, silicone’s ponding-water tolerance is a game-changer. It doesn’t absorb water, re-emulsify, or break down under standing moisture — unlike acrylic.
The SF Roof Coating Reality: The Leaks, The Repairs, The Long Game
Reddit gold from an SF roofer (r/sanfrancisco, 2023):
“SBS is better for foot traffic, PVC better on budget constraints. Most Bay Area commercial work? Silicone is the default recommendation — the long-term performance difference justifies the modest cost premium.”
But here’s what doesn’t make it to social media.
The Maintenance Truth
Silicone coating is not “set it and forget it.” Your roof still needs:
- Annual inspection (spring and fall, before/after rainy season)
- Drain cleaning (critical in fog-belt neighbourhoods where debris accumulates)
- Debris removal (leaves, twigs, accumulated organic matter)
- Seam inspection at penetrations (HVAC curbs, skylights, drains)
Neglect these? Your 15–20 year coating is done in 7–10 years.
The Common Failure Pattern
We see it on 2–3 month-old jobs after a heavy rain:
- Coating applied in fall (seems perfect)
- Winter rain hits
- Water pools in corner where drain clogs with leaves
- Coating holds, but sitting water underneath accelerates insulation decay
- By spring, there’s a soft spot
The fix: Clear the drain before the rain. A $200 maintenance call beats a $8,000 roof replacement two years later.
The Honesty Check
Not every roofer will say this, but: if your building is for sale in 3–5 years, full roof replacement gets you more money at close. Silicone coating is the budget play for owners holding long-term.
Silicone Roof Coating Installation: What Actually Happens on Your Roof
You need to know the process because installation quality directly correlates to lifespan.
Step 1: Infrared Moisture Scan ($300–$500)
Before a single drop of silicone hits your roof, a thermal imaging scan confirms the insulation is dry. If it’s saturated, the coating is off the table. A structural solution (deck exposure, insulation replacement) is needed first.
Step 2: Power Wash & Surface Prep (Day 1)
This is where 70% of coating failures originate.
The roof is power-washed to remove dirt, mold, algae, and old acrylic coating that’s peeling. Pressure is critical — too high and you damage the membrane; too low and you leave contaminants.
SF contractors use 1,500–2,000 PSI on modified bitumen and torch-down. On older acrylic, loose material is scraped off manually.
Common miss: Contractors skip detailed prep in corners and around penetrations. Those are exactly where water pools and coating delaminates first.
Step 3: Seam & Penetration Repair (Day 2)
Any visible seam failures are reinforced with polyester fabric embedded in a primer coat. This is labor-intensive and unglamorous but essential.
- HVAC curbs get 2-foot perimeter reinforcement
- Skylights get 3-foot radius coverage
- Drain rings get full circumference wrap
- Corners and valleys get double-layer reinforcement
Step 4: Primer Application (Day 3)
Manufacturer-specified primer is applied to ensure adhesion. On acrylic-coated roofs, this is non-negotiable. On bare bitumen, it’s often optional but recommended by quality contractors.
Step 5: First Silicone Coat (Day 4–5)
The first coat is applied at 10–15 mils thickness. This is where spray application becomes critical — airless sprayers create uniform coverage that rolling can’t match.
Application rate: ~2.5 gallons per 100 sq ft.
Step 6: Second Silicone Coat (Day 6–8)
After the first coat cures (typically 24–48 hours, faster in fog), the second coat brings thickness to 20–30 mils.
Two coats are standard. One coat is a false economy.
Step 7: Inspection & Warranty Registration (Day 8–10)
Mil thickness is verified with a wet-film gauge. Photos are taken. Warranty documents are registered with the manufacturer.
Real SF Project: The Mission District Torch-Down That Became a Silicone Success
- A three-story mixed-use building (retail below, apartments above) in the Mission at 24th and Valencia. 1998 torch-down roof, failing in corners and around the rooftop HVAC units.
The situation:
- Roof age: 21 years
- Visible damage: ~18% of roof area
- Saturated insulation? Infrared scan said no.
- Active leaks? Two small ones in southwest corner.
- Owner’s constraint: Couldn’t disrupt retail for more than 5 days.
Full replacement bid: $32,000, 14-day timeline, required tenant relocation.
Silicone coating bid: $7,500, 8-day timeline, minimal disruption.
The work:
- Power wash (Day 1–2)
- Southwest corner seam repair + polyester reinforcement (Day 2–3)
- HVAC curb reinforcement (Day 3)
- Two-coat silicone application (Day 4–7)
- Inspection & closeout (Day 8)
Outcome:
- Retail closed for 2 days (during application)
- Apartments had zero disruption
- 15-year warranty backed by GE Enduris
- Owner planned to hold 10 years; coating gave them 25
That’s the silicone story in SF. Not glamorous. Not revolutionary. Just practical.
Frequently Asked Questions: Silicone Roof Coating San Francisco
When Silicone Coating Is Your Answer
Choose silicone roof coating if:
- Your roof is 12–25 years old and structurally sound
- You’re holding the property 10+ years
- Full replacement is outside this year’s budget
- Ponding water is minimal or absent
- Insulation is dry (confirmed by infrared)
- You’re willing to maintain drains annually
Do NOT choose silicone coating if:
- Your roof has active leaks you haven’t fixed
- Insulation is saturated
- More than 25% of the roof needs structural repair
- You’re selling the building in 3 years (replacement adds more value at close)
- Roof surface temperature reduction isn’t a priority
Ready for a silicone roof coating assessment?
Call us for a free infrared moisture scan and 30-minute consultation. We’ll tell you honestly whether your roof is a coating candidate or if replacement is the right call.
Serving all SF ZIP codes: 94102–94158 (and East Bay / Marin for larger commercial projects).