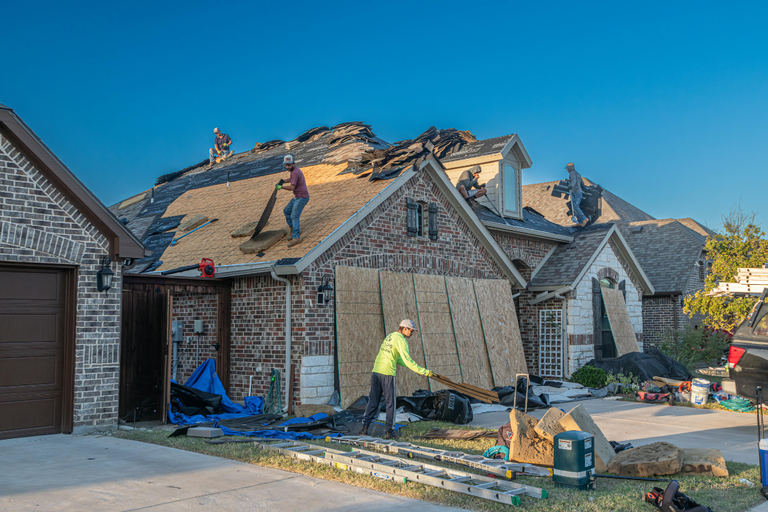

Roof Leak Detection in San Francisco | Methods, Costs & No-Attic Fixes

Key Facts
- Water rarely enters where it drips. It gets in at a failed flashing or cracked boot, runs along decking or a rafter, and shows up feet away.
- The stain is a clue, not a diagnosis. Chasing the ceiling spot almost never works.
- Most leaks are found by a simple sequence: look, trace from inside, test one small section at a time, then confirm with a tool.
- Flat roofs are different. Water can travel a long way under a membrane before it finds a way down.
- Detection cost is not a separate national price. In San Francisco, detection sits inside a detailed inspection, and repair then follows normal repair ranges.
- This is a diagnostic post. The service and repair side stays on the San Francisco roof leak repair guide.
Why the stain on your ceiling is almost never the leak
I start inside, not on the roof. A brown ring on a bedroom ceiling tells me water got in somewhere uphill from that spot, not that the hole is above the ring.
On a pitched roof, water follows the path of least resistance: down a rafter, along a decking seam, behind a flashing, then down through the first weak point in the ceiling. On a flat roof, it can spread through layers and deck channels before it drops. Trade reports put that travel at up to 20 feet on flat roofs, which is why measuring matters more than guessing.
That is also why a roofer who only looks at the ceiling, or only patches the shingles above the stain, often misses it. The first rule of roof leak detection in San Francisco is simple: trace the trail, do not chase the stain.
If you have just found a leak, the first-hour steps are covered in the roof leak after rain guide. This page is about finding the source before anyone starts cutting or coating.
Roof leak detection methods at a glance
This is the decision table to use before you pick a method. No single tool finds every leak.
| Method | Finds | Best for | Fails when | DIY or pro only |
| Visual inspection | Failed flashing, cracked boots, missing shingles, rusty nails | Pitched roofs, first check on any roof | Leak is under a membrane or inside a wall | DIY look, pro roof walk |
| Attic and interior trace | Water trails, stained decking, daylight, drip path | Any home with attic access | No attic, finished ceiling, foam-filled rafters | DIY with care, pro for tight attics |
| Controlled hose test | Exact leaking detail, one section at a time | Stubborn pitched and flat leaks | Wind-driven rain, heavy-rain volume, too-fast testing | DIY with two people, pro for steep roofs |
| Thermal camera | Damp insulation and trapped moisture you cannot see | Flat and commercial roofs, hidden spread | Fog, wind, rain, or an untrained reading | Pro only for a reliable reading |
| Moisture meter | Confirms a spot is actively wet | Verifying a suspect area inside | Cannot search a whole roof by itself | DIY or pro, as a check not a search |
| Electronic leak detection | Pinholes and seam failures in membranes | Flat and low-slope membranes | Wrong membrane type, no conductive layer | Pro only |
| Flood test | Widespread membrane failure | Large flat roofs, pro diagnosis | Slope, weight, drainage risk | Pro only |
| Cut inspection holes | Hidden path when there is no attic | Condos and flats with finished ceilings | Done too early, before simpler checks | Pro only |
Visual inspection first: flashings, boots, valleys and nails
Visual inspection solves most leaks, and it is where every good diagnosis starts.
On the roof, I check the usual suspects in order, not at random:
- Flashing around chimneys, skylights, parapets and walls, including step flashing at wall steps and counterflashing at chimneys
- Rubber boots around plumbing vents, where the collar cracks from sun exposure. Trade reports put that cracking at around 10 years, but sun, slope and material change it, so check the boot, do not go by age alone
- Valleys where two roof planes meet, including valley screws that have elongated, nail holes through underlayment, and valleys clogged with mud that overflow into the eaves
- Seams, laps and any spot where seal has failed or shingles are missing, cracked or curling
- Nails uphill from the drip, especially rusty nails or nails sitting in or close to sheathing seams. A rusty nail is often a sign water has been passing that point
Inside, I look for the same story from below: water trails, stained decking, daylight through a gap, and damp insulation. Photograph both sides, with dates. That photo record matters later if a second roofer, an insurer or a contractor needs to see what changed.
The most common San Francisco failure is not the field of the roof. It is a transition. Roof flashing repair is where most pitched-roof leaks live: parapet caps, termination bars, skylight curbs, chimney bases and wall steps. If your leak keeps coming back in the same corner after the field was replaced, stop replacing the field and investigate the flashing and the wall envelope instead.
Attic and interior tracing: follow the trail uphill
If you have attic access, use it during or right after rain. That is when the trail is visible.
Work uphill from the stain, not downhill from the roof. Look for:
- Dark stains on decking and rafters
- Wet insulation, and insulation that is damp on one side only
- Rusted nails and stained sheathing seams above the drip point
- Daylight, which means a gap, not just a stain
- Water marks that change direction at a valley, a vent or a wall
A roofer who will not check the attic is a red flag. Homeowners report this again and again as the trust test: if the attic is skipped, the diagnosis is a guess. A detailed inspection includes the attic when access exists.
Do not drive a spike, nail or screw through the roof from inside to mark a spot. That advice appears in some online summaries and it creates a new hole in the very roof you are trying to fix. Mark with chalk or tape on the inside, photograph it, and transfer the measurement to the roof from two fixed points, such as two walls. On a flat roof, that two-wall measurement is essential because the interior stain and the roof entry point can be far apart.
Controlled hose test: slow, low and one section at a time
When the source is not obvious, a controlled water test is often the surest way to reproduce a stubborn leak and confirm a fix.
It takes two people. One wets small sections of roof in sequence, low areas first, working uphill. The other watches inside the attic for water to appear. Work in strips of about 10 to 15 square feet, or about 4-foot sections, with a gentle spray only. Give each section 10 to 15 minutes before moving on, because water can take time to appear inside.
The moment the drip starts, stop and note exactly which area was being watered. Chalk it, tape it, photograph it. That note is the diagnosis.
A hose test has limits, and a good roofer will say so:
- A hose does not reproduce heavy-rain volume. A leak that only appears in a downpour may not appear under a hose.
- A hose does not reproduce wind direction. A wind-driven leak that enters sideways can be missed by a downward-only spray. For a driving-rain leak, a directional spray from the wind side, done carefully, is part of the test.
- Too much water, too fast, creates false positives and can soak dry insulation that was never part of the leak.
- High-pressure jets damage shingles and force water where it would never go in rain. Gentle spray only.
Never stop at the first source you find. Trade experience is blunt on this point: do not be too cocky. In one worked case, valley screws looked like the cause but were not the main cause. In another, a confident soaker-flashing diagnosis was wrong, and the real cause was a pop-rivet hole in a metal roof. Find one source, fix the test, then test again if the pattern suggests a second entry point.
Thermal camera and moisture meter: what they can and cannot do
A thermal camera shows damp areas that are not yet visible. Wet insulation holds heat differently from dry insulation, so an infrared image can reveal moisture trapped under a flat roof surface, or spread across decking far from where it got in.
It is a powerful tool and an easy one to misread. In San Francisco, fog and marine-layer damp complicate the reading, and rain and wind skew it. The best readings come during evening cooling, when wet and dry areas separate, and they still need a trained interpreter. A bright patch on a screen is not, by itself, a leak location.
A moisture meter backs up a thermal finding by confirming exactly where material is wet. It verifies a suspect spot. It does not search a whole roof. Use it as a check, not as the search itself.
If a report shows only thermal images with no marked entry point, no moisture readings and no repair scope, it is not a finished diagnosis. It is a clue that still needs tracing.
Flat roof leak detection in San Francisco
Flat and low-slope roofs need a different mindset, and this is where San Francisco’s SoMa and Mission buildings, older warehouses and commercial roofs cause the most trouble.
Water on a flat roof does not run off the way it does on a pitched roof. It spreads under the membrane, follows deck channels, and drops where the ceiling or a penetration gives it a way through. That is why flat roof leaking in San Francisco is often a travel problem, not a hole-above-the-stain problem.
For flat roofs, the method order changes:
- Start with ponding, drains, scuppers and seams. Ponding water on a flat roof that sits for 48 hours or more is a warning sign, not just a puddle. One inch of standing water adds about 5 pounds per square foot of load, which is why drainage is a structural question as well as a leak question.
- Check every penetration, curb, parapet cap and termination bar before assuming the membrane field has failed.
- Use thermal imaging and moisture mapping to find trapped moisture spread, then confirm with a meter.
- For membrane pinholes and seam failures, electronic leak detection is the pro tool. Low-voltage vector mapping uses a thin water layer and a charged bristle or wire to complete a circuit where moisture bridges a defect. High-voltage spark testing does a similar job on suitable membranes and can catch weak areas that are not yet leaking. Both need the right membrane and substrate, and low-voltage testing can give false positives on some materials. Neither is a homeowner tool.
Flood testing belongs in the pro-only column for a reason. It involves holding about 2 inches of water on a roof for a day or two. On a slope, on a roof with blocked drains, or on a structure that cannot take the weight, that is dangerous. Homeowner guides that mention flood testing without that warning are incomplete.
For wet-weather timing, the flat roof repair in wet weather guide covers what can be done in rain and what must wait for dry conditions. Detection and repair are not the same decision: you can often trace a leak in rain, but you cannot weld, glue or seal every system in rain.
No attic? How to find a leak in a condo, flat or finished ceiling
This is the question competitors ask and nobody answers well, and it matters all over San Francisco where flats, condos and shared-wall buildings have no attic to trace through.
If there is no attic, the route is:
- Start with the interior stain diary. Note the rain type, wind direction, timing and which rooms are affected. A leak that appears only in wind-driven rain, only in heavy rain, or only after a long soak points to different entry points.
- Measure the stain to two walls, transfer that measurement to the roof, then expand the search uphill and sideways from that point, not just directly above it.
- Check shared details first: parapets, party walls, skylight curbs, vents that serve more than one unit, and any place where a neighbour’s recent roof work changed how water flows. A neighbour’s new roof can change flow onto your roof, and that is a real cause, not an excuse.
- Use thermal imaging and a moisture meter from inside to narrow the wet area before cutting anything.
- Cut inspection holes only as a last resort, only in the wet area, and only to trace water marks to the source. Cutting blindly through a finished ceiling without a narrowed area creates damage without a diagnosis.
If rafters are filled with closed-cell foam, tracing is harder again. Foam hides the trail and blocks the usual attic route. No reliable homeowner method for foam-filled rafters came up in the sources checked for this guide, and this page will not invent one. That is a pro inspection with thermal and meter work, and sometimes a small, targeted opening, not a hose-and-hope job.
What causes roof leaks in San Francisco: problem by problem
San Francisco leaks are not Austin leaks or Denver leaks. The climate and the building stock change the causes.
Fog and marine-layer damp keep roofs damp for longer, salt air attacks flashings and fasteners first, and wind-driven rain from the Pacific enters sideways through details that vertical rain never tests. Victorian and Edwardian parapets, valleys, skylights and complex flashing junctions fail before the field does. Flat roofs in SoMa and the Mission, and older pitched roofs in Richmond and Sunset, fail in different ways.
| Problem | Likely cause in San Francisco | Fix that lasts | Fix that fails |
| Leak at chimney, skylight or wall | Failed step flashing, counterflashing or parapet cap | Replace flashing properly, reseal the detail | Smearing tar or sealant over the flashing |
| Leak at a vent pipe | Cracked rubber boot collar | Replace the whole boot assembly | Sealant alone over a cracked collar |
| Rusty nails uphill from drip | Angled or popped nails, coating rusted out | Drive flat or replace, seal properly, reseal shingle strip | Leaving a popped nail and coating it |
| Valley leak | Elongated valley screws, nail holes, clogged valley | Remove screws, seal holes, clear valley, check uphill source | Patching the valley floor only |
| Flat roof drip far from entry | Water travelling under membrane | Trace, map moisture, repair entry point and seam | Coating the whole roof to stop a leak |
| Metal roof leak | Rusted screw holes, unseated screws, pinholes at bends | Larger replacement screws, dab every screw, clean rust | Coating the whole roof before repair |
| Short metal sheets at gutter | Sheet overlap too short, sealant trapping water | Seal rivet hole, remove sealant at ribs so water weeps out | Sealing the rib shut and trapping water |
| Leak after neighbour reroof | Changed water flow onto your roof | Trace new flow path, fix flashing and drainage | Blaming the field and replacing shingles |
| Damp patch that is not a leak | Condensation, plumbing or HVAC penetration | Find the real source, ventilate or fix the penetration | Replacing roofing over a condensation problem |
A few specific traps from trade reports are worth naming plainly:
- Tar over everything. Tarring over a torch-down roof with an EPDM patch, tarring a whole wall, or coating a whole roof to stop a leak hides the entry point and makes the next diagnosis harder. Coating is UV protection after a repair, not a leak repair by itself.
- Sealing a shingle shut. A temporary aluminium step flashing slipped past a nail hole and past the next bond line can buy time, but leave a weep gap. Sealing an entire shingle shut traps water.
- Flex Seal on roofs. Trade roofers are bluntly against it as a roof repair. It is not a substitute for replacing a boot, a flashing or a failed detail.
- “Will never leak” and “lasts 20 years.” Those are seller claims, not facts. No patch, coating or sealant carries that guarantee on a San Francisco roof exposed to fog, salt and wind-driven rain.
- Shingle replacement as detection. Replacing shingles is repair, not detection. If a guide lists it as a detection method, it is conflating the two jobs.
Other causes that get missed: downpipe spreaders dumping water onto tiles below, mud-clogged valleys overflowing into eaves, missing soaker flashing at wall steps, and incompatible patches, such as an EPDM patch tarred over torch-down. Check uphill for the real source before settling on the first damaged detail you see.
Leak or condensation? How to tell them apart
Condensation is routinely mistaken for a leak in San Francisco, especially in foggy, poorly ventilated spaces.
A leak usually follows rain, follows a trail, and leaves a stain pattern tied to a roof detail. Condensation usually appears in cold, damp, poorly ventilated areas, without a rain trail, and often around metal, vents or uninsulated ducts. Plumbing and HVAC penetrations add a third possibility, and this is where trade-bouncing happens: the roofer says plumber, the plumber says roofer, the HVAC tech says neither owns the penetration.
Do not let that bounce become the diagnosis. The penetration itself needs an owner. A detailed inspection should name which trade owns which detail, and what was checked on each side of it.
This guide does not give mould remediation steps, because no reliable mould method appeared in the sources checked. After the leak is fixed, get a separate assessment for any mould concern. Fixing the water source comes first, in any case.
San Francisco neighbourhoods, ZIP codes, fog and wind
Leak detection changes by neighbourhood because roof type, age and exposure change.
| Neighbourhood | ZIP | What leaks look like here |
| SoMa | 94103 | Flat and low-slope commercial roofs, long water travel under membranes |
| Mission District | 94110 | Older pitched roofs, parapets, skylights and complex wall junctions |
| Inner Richmond | 94118 | Fog-belt pitched roofs, flashing and fastener wear from salt air |
| Outer Richmond | 94121 | Fog-belt exposure, wind-driven rain entering sideways |
| Sunset District | 94122 | Fog and wind exposure, flat and pitched mix, valley and vent failures |
| Parkside | 94116 | Fog-belt pitched roofs, vent boots and valley wear |
Fog does not just wet a roof. It keeps it damp between rains, which hides drying patterns on thermal images and makes a small leak look like general damp. Salt air hits flashings and fasteners first, which is why a flashing check comes before a field check in the Richmond and Sunset.
Wind-driven rain is the other San Francisco factor. A roof that passes a vertical hose test can still leak in a Pacific wind event, because water is driven sideways into laps, vents and wall junctions. If your leak only appears in wind, tell the inspector that. It changes the test.
The marine-layer effect on roof life, and why fog-belt roofs age differently, is covered in the marine layer roof lifespan guide. Detection in fog is slower and needs more confirmation, not less.
What a detailed inspection should hand you
A good leak inspection does not end with “you need a new roof.” It ends with evidence you can check.
Ask for:
- The marked entry point, not just the stain location
- Photographs from both sides: roof detail and interior trail
- Moisture readings where a meter or thermal camera was used, with the location noted
- A repair scope tied to that entry point: which flashing, boot, seam or detail, and what will be replaced
- A note on what was ruled out, including condensation and neighbouring flow, where relevant
- A separate price for repair, not a replacement quote presented as the only option
If the only scope offered is a full replacement for one small leak, get a second inspection. Full replacement for a single leak is a persistent homeowner complaint for a reason. Sometimes replacement is right, when the field, decking or multiple details have failed together. Often, a targeted repair at the true entry point is the honest answer.
For commercial roofs, the same rule applies with a different scale. Infrared, electronic detection and moisture mapping are the right tools, and a commercial roofing inspection should return a marked CAD or photo-marked drawing for a large flat roof, not just a verbal “it is wet somewhere.”
Prevention: the checks that stop the next leak
Prevention is not a product. It is a short routine, done after heavy rain and once a year before winter:
- Check the attic after heavy rain, not just when a stain appears
- Clear gutters and valleys so water keeps moving and does not overflow into eaves
- Inspect pipe boots around year 10, and sooner if collars look cracked or lifted
- After any new roof or major repair, ask for a spray test before the crew leaves. A post-installation spray test catches a missed detail while the crew is still there
- Photograph and date every stain and every repair, so the next leak can be compared to the last one
- Trim limbs that drop debris into valleys and gutters
- Reject a roofer who skips the attic, and get multiple inspections or quotes for a flat or stubborn leak. A dedicated leak-detection specialist is worth it when a general repair quote keeps missing the source
- Keep water moving. Never let a repair create a tar or sealant dam that traps water behind it
Asphalt shingle life is often quoted as 20 to 25 years in trade content. Treat that as a range, not a deadline. Slope, sun, fog exposure and flashing condition matter more than a single number.
How we checked this guide
This guide was built from competitor leak-detection pages, homeowner threads and trade videos, then checked against San Francisco roof types and the site’s own live leak, flashing, flat-roof and wet-weather pages. Competitor methods that do not fit San Francisco, such as hail, freeze-thaw and snow causes from Austin and Denver pages, were left out. Creator claims, such as nail-coating life and boot-cracking age, are labelled as trade reports, not guarantees. No detection price was invented, because no reliable San Francisco detection price appeared in the sources checked. Where sources disagreed or stayed silent, this page says so instead of filling the gap.
Frequently Asked Questions
Bottom line
Find the entry point first. Trace from inside, test one section at a time, confirm with a tool where eyes cannot reach, and do not accept a full replacement as the only answer for a single leak. A detailed inspection should leave you with a marked source, photographs, readings and a repair scope tied to that source.